Help Center & Jigsaw Generation Guide
Complete guide to professional jigsaw cutline generation and custom puzzle design using JigsawDesigner.
Table of Contents
1Getting Started
Create Your First Project
- 01Launch JigsawDesignerOpen the application on your Mac or iOS device.
- 02Choose a ToolSelect from 8 drawing tools in the toolbar.
- 03Draw Your DesignCreate shapes, paths, or import existing SVG files.
- 04Generate JigsawClick "Generate Jigsaw" to create puzzle pieces.
- 05ExportSave your puzzle as SVG for manufacturing or printing.
2Project Library
The Project Library is your central hub for managing all jigsaw puzzle designs. Access it from the Welcome screen or via File → Project Library.
My Projects
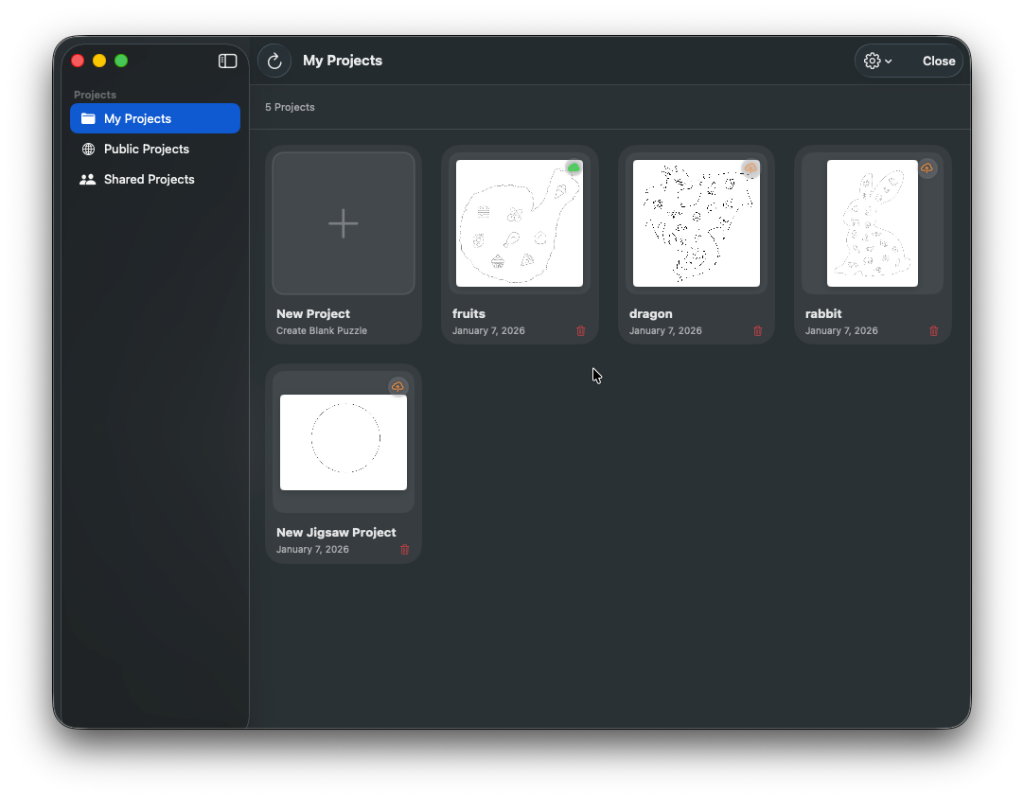
Your personal workspace for all jigsaw designs, stored securely in iCloud.
- •Automatic iCloud sync across Mac, iPad, and iPhone
- •Create new projects with the + button
- •Thumbnail previews with project name and date
- •Delete projects using the red trash button
- •Projects marked with cloud icon indicate sync status
Right-Click Context Menu
Right-click (or long-press on iPad/iPhone) on any project to access these options:
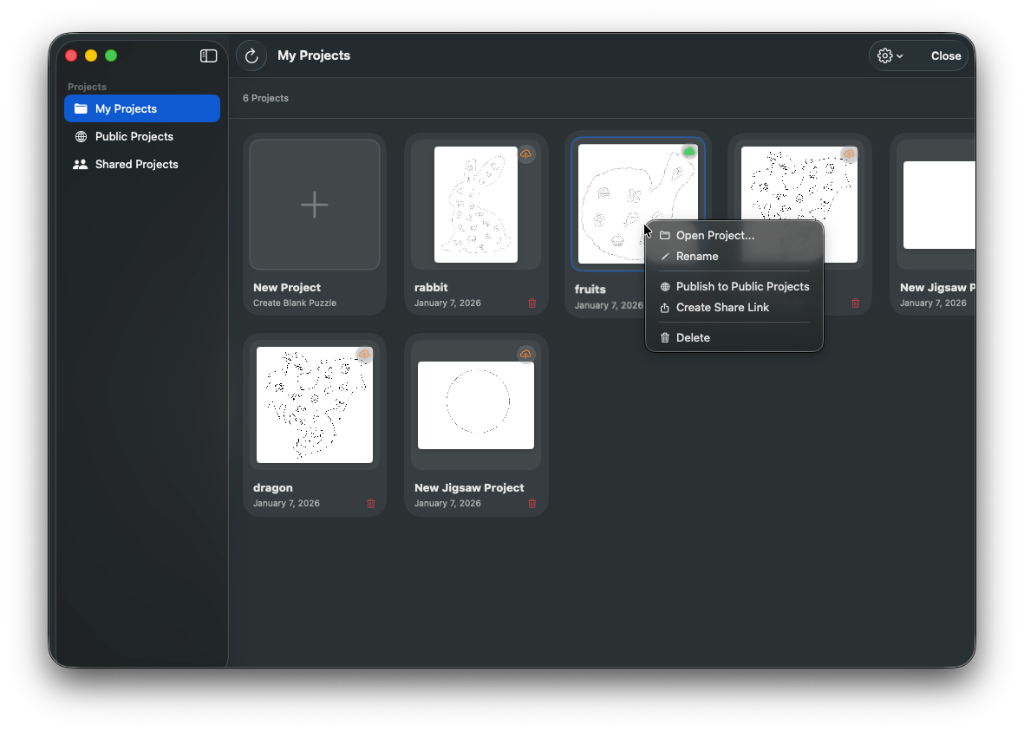
Open the project in the editor
Change the project name
Share your design with all JigsawDesigner users worldwide. Published projects appear in the Public Projects library for everyone to import and learn from.
Generate an iCloud sharing link. Send this link to colleagues or friends - when they open it, your project appears in their Shared Projects section. You can choose read-only or edit access.
Permanently remove the project
Public Projects
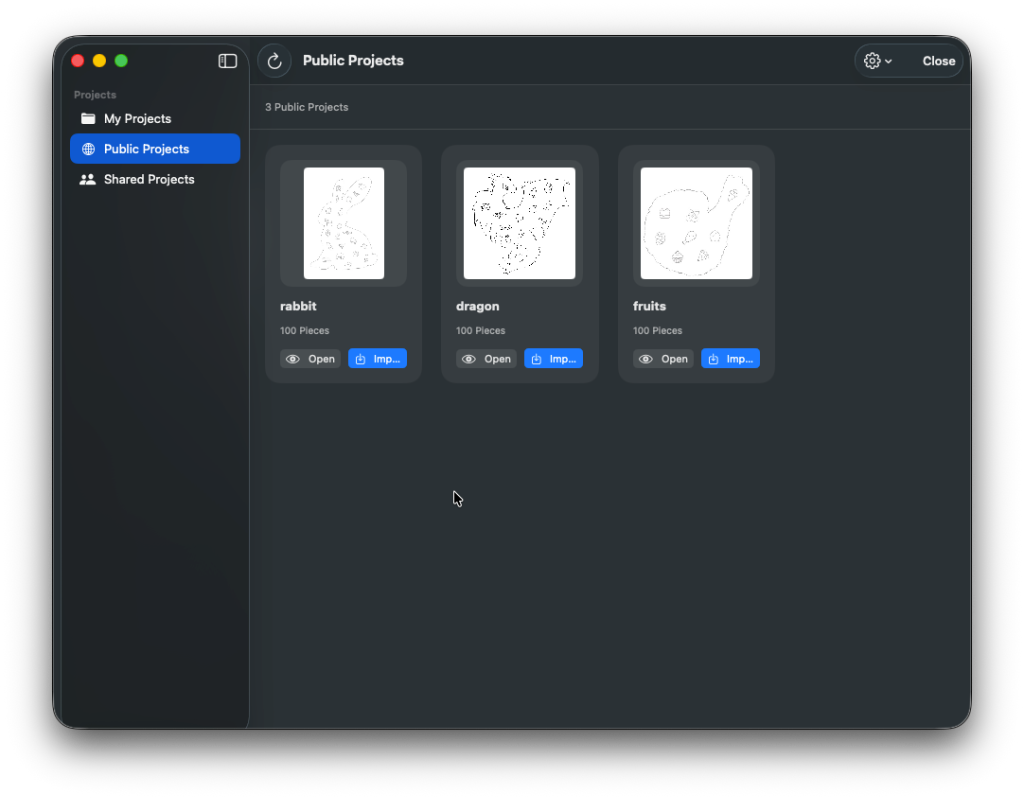
Community-shared templates available to all users. Browse, preview, and import designs from our public library.
- •Browse templates created by the JigsawDesigner team
- •View piece count before importing
- •Click 'Open' to preview the design
- •Click 'Import' to copy to your My Projects
- •Great for learning and inspiration
Shared Projects
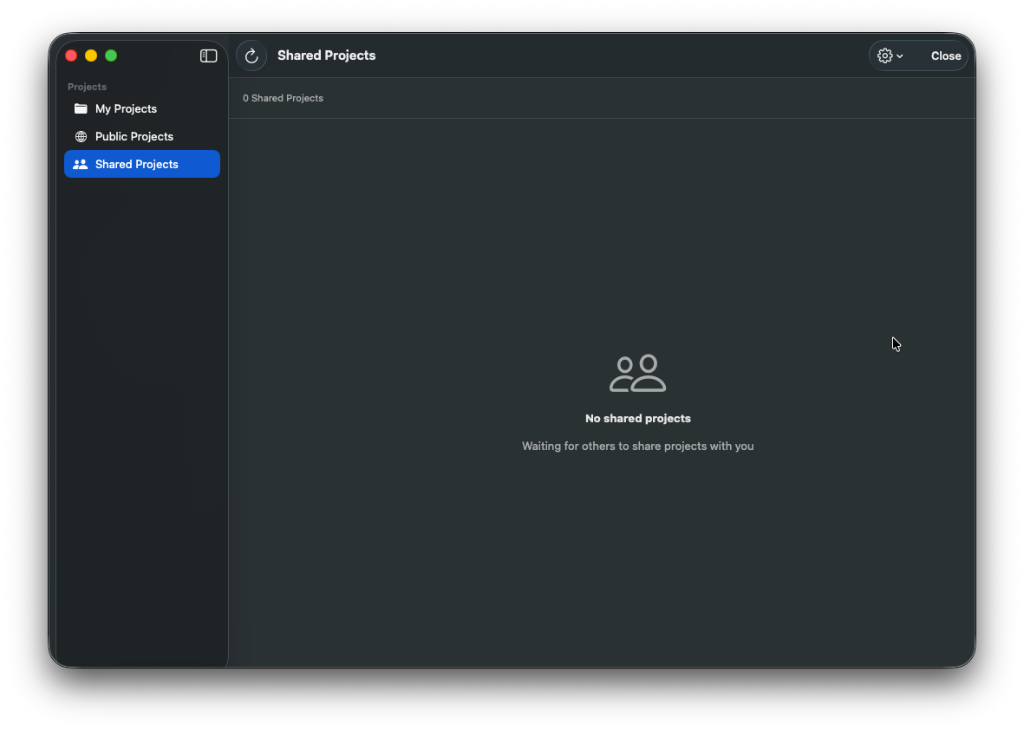
Collaborative workspace for projects shared with you by other users via iCloud sharing.
- •Receive projects shared by colleagues or friends
- •View-only or edit access based on permissions
- •Real-time sync with the project owner
- •Accept shares via invitation link
3Editor Interface
The JigsawDesigner editor provides a professional vector workspace for designing precision jigsaw cutlines and puzzle dielines. Master each tool to create high-quality laser-cut templates.
Top Toolbar
The toolbar provides quick access to all drawing tools and file operations.

Infinite Canvas
The main workspace where you create your jigsaw puzzle designs.
- •Infinite scrolling - canvas extends in all directions
- •Ruler display with pixel measurements
- •Grid overlay for precise alignment
- •Zoom in/out with scroll wheel or pinch gesture
- •Pan by dragging with spacebar held or two-finger drag
- •Selection box shows when element is selected
Tools Panel
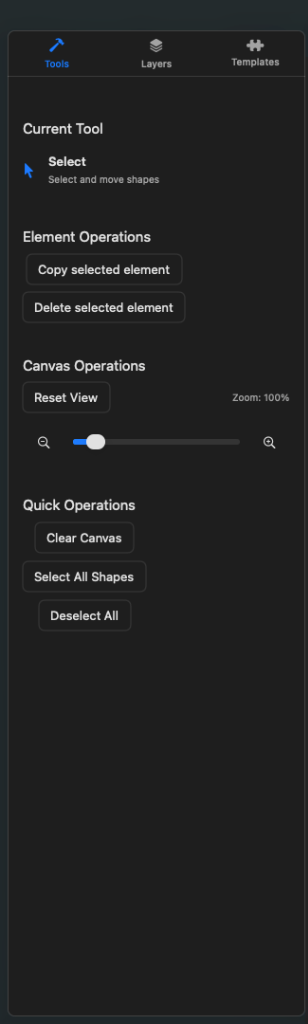
The Tools panel provides quick access to common operations and the current tool information.
Shows the currently selected drawing tool and its description.
Copy or delete the currently selected element with one click.
Reset the view to center, and adjust zoom level using the slider (displayed as percentage).
Clear the entire canvas, select all shapes, or deselect all with convenient buttons.
Layers Panel
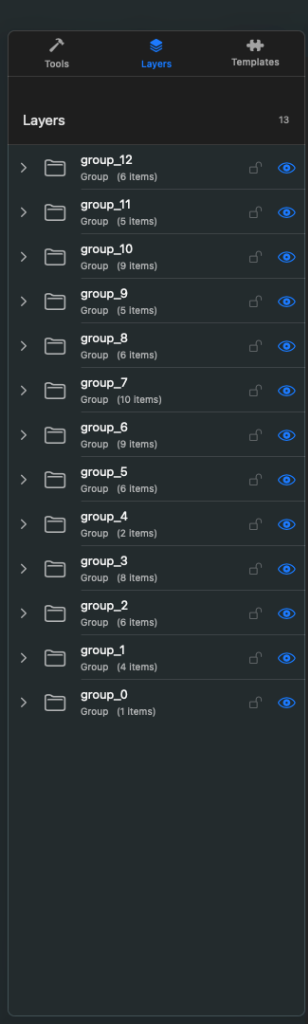
Manage your design hierarchy with the Layers panel - similar to Photoshop or Illustrator.
- •View all groups and shapes in a tree structure
- •Expand groups to see nested items
- •Lock shapes to prevent accidental edits (lock icon)
- •Toggle visibility to hide/show elements (eye icon)
- •Total layer count displayed at the top
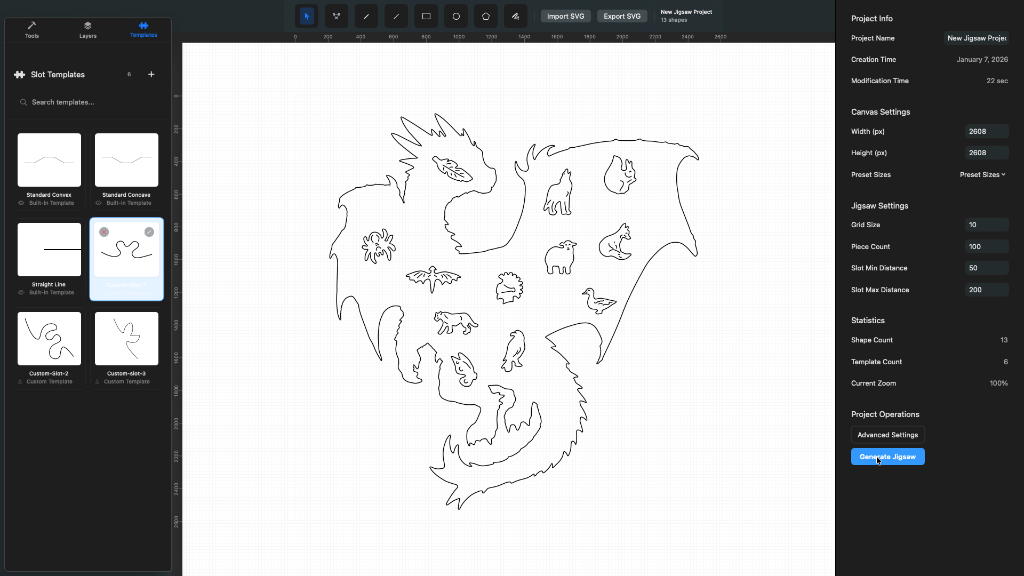
Templates Panel
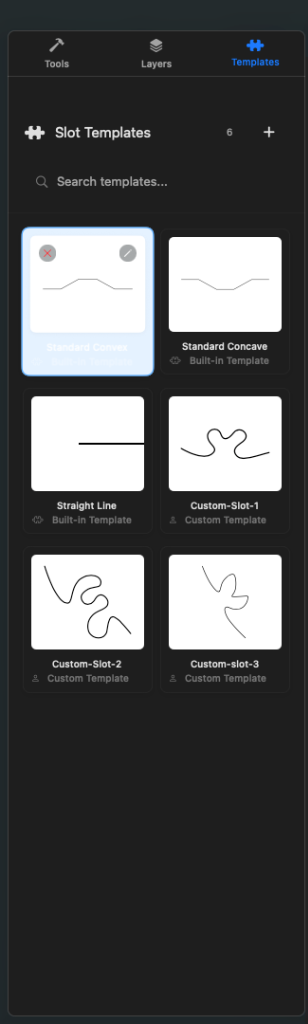
Slot templates define the shape of puzzle piece connections. This panel lets you manage and create custom templates.
- •Built-in templates: Standard Convex, Standard Concave, Straight Line
- •Create custom templates by clicking the + button
- •Search templates by name
- •Select a template to use it for jigsaw generation
- •Custom templates are saved to your project
Pre-designed slot shapes provided by JigsawDesigner. Includes classic convex/concave jigsaw tabs.
Design your own unique slot shapes using the bezier drawing tools. Perfect for creating distinctive puzzle styles.
Project Inspector
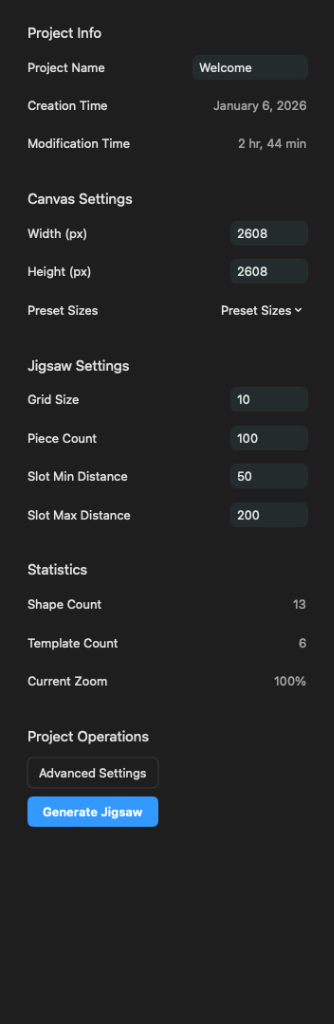
The right-side inspector provides all project configuration options.
View and edit project name, creation date, and modification time.
Set canvas width and height in pixels, or choose from preset sizes (A4, A3, Letter, etc.).
Configure grid size, target piece count, and slot distance range for puzzle generation.
View shape count, template count, and current zoom level.
Access Advanced Settings and the Generate Jigsaw button.
Shape Inspector
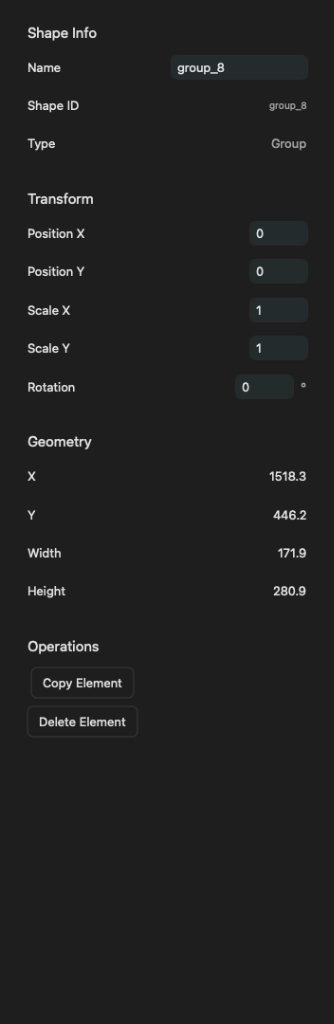
When a shape or group is selected, the right panel shows detailed information about that element.
View and edit the selected element's name, ID, and type (Path, Group, Circle, etc.).
Adjust position (X, Y), scale, and rotation of the selected element.
View the element's bounding box dimensions and position.
Copy or delete the selected element with one click.
Advanced Settings
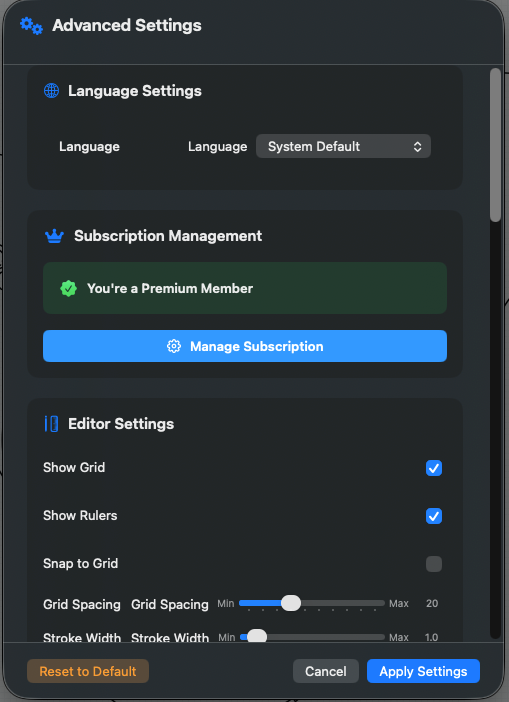
Access comprehensive application settings through the Advanced Settings dialog.
Change the application language. Supports System Default or choose from 40+ languages.
View your subscription status and manage your Premium membership.
Customize the canvas display including grid, rulers, snap-to-grid, grid spacing, and stroke width.
- •Show Grid: Show/Hide Grid overlay
- •Show Rulers: Show/Hide Rulers
- •Snap to Grid: Enable/Disable Snap to Grid
- •Grid Spacing: Adjust Grid Spacing (pixel distance)
- •Stroke Width: Set Stroke Width for shapes
Template Editor
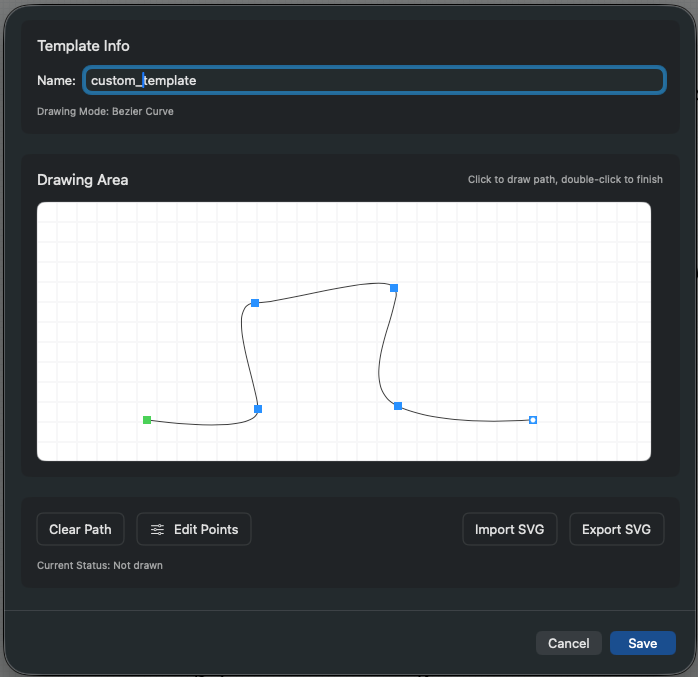
Create custom slot templates using the built-in bezier curve drawing tool.
- •Name your custom template
- •Draw bezier curves with click and drag
- •Double-click to finish the path
- •Edit individual control points
- •Import existing SVG templates
- •Export templates for backup
Clear the current drawing
Switch to point editing mode
Import an SVG file as template
Export the template as SVG
4Jigsaw Cutline Generation
JigsawDesigner uses advanced C++ algorithms (Voronoi & DCEL) to generate professional interlocking puzzle cutlines and die-lines. Follow these 4 steps to create your custom puzzle pattern:
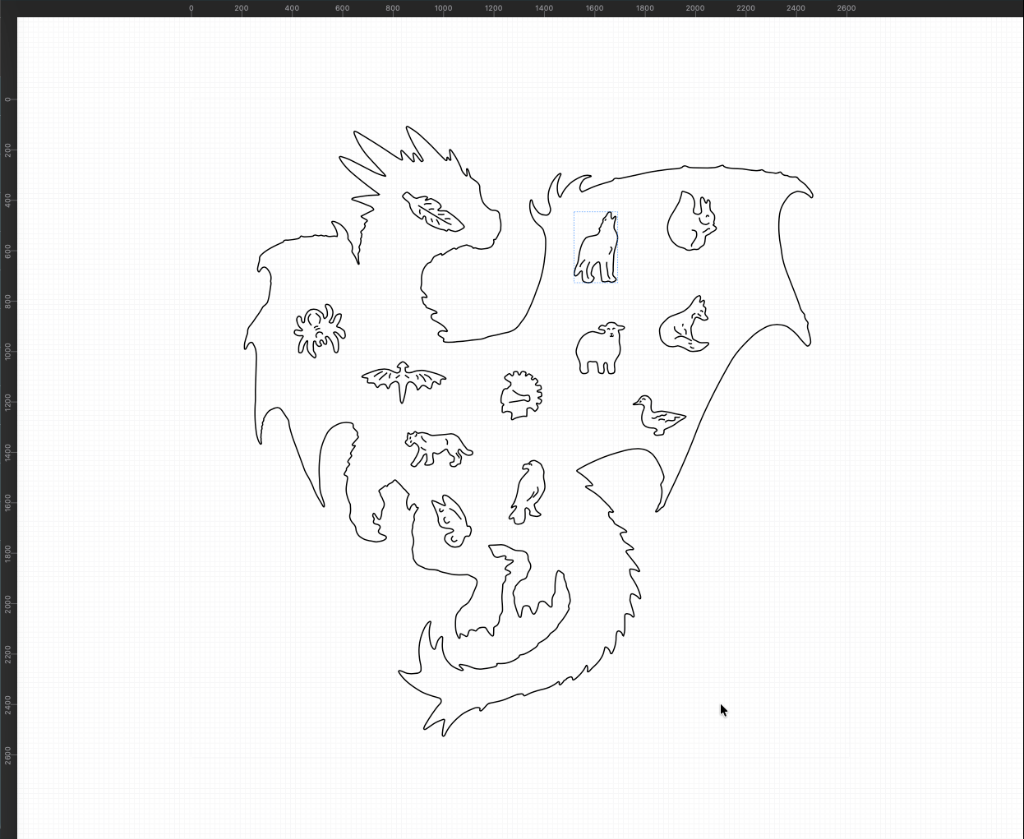
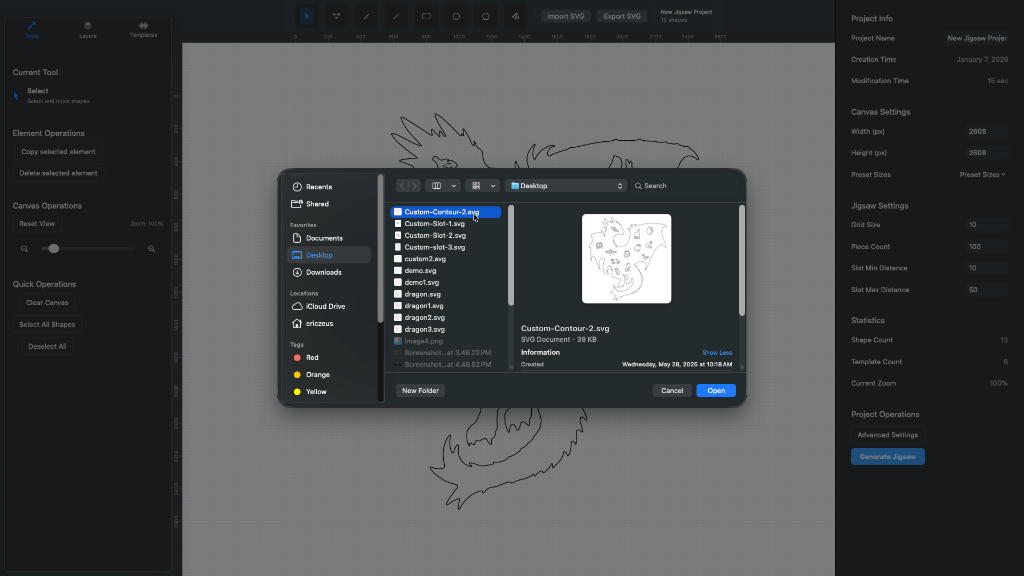
Import Boundary Contour
Start by clicking 'Import SVG' or drawing a custom vector shape to define the outer boundary and interior 'whimsy' shapes of your jigsaw cutline.
Select Slot Template
Open the 'Templates' tab to select a slot design (Standard Convex, Multi-point, etc.) to define how your interlocking pieces connect.

Configure Generation Parameters
Use the 'Inspector' to set Grid Size, Piece Count, and Slot Distance range. These parameters control the density and complexity of theGenerated cutlines.
Generate Jigsaw Cutlines
Click 'Generate Jigsaw' to run the algorithm. Within seconds, you'll have a perfectly interlocking puzzle dieline ready for laser cutting or printing.

5SVG Drawing Tools
Select Tool
Select and move shapes on the canvas. Shift+Click for multi-select, Ctrl+Click to drill into groups.
Edit Tool
Edit control points of shapes. Adjust shape geometry precisely by dragging points.
Pen Tool
Free-form path drawing. Click and drag to create bezier curves and organic shapes.
Line Tool
Draw straight lines. Perfect for geometric designs and precise connections.
Rectangle Tool
Draw rectangular shapes. Click and drag from corner to create.
Circle Tool
Draw circles and ellipses. Drag from center to set radius.
Polygon Tool
Draw multi-sided polygons. Click to place each vertex, double-click to finish.
Bezier Tool
Draw precise Bezier curves with anchor points and control handles.
6Puzzle Element Operations
Selection
- •Single Select: Click on any shape
- •Multi-Select: Shift+Click multiple shapes
- •Select All: Press ⌘A to select all shapes
- •Deep Selection: Ctrl+Click to select child elements in groups
Grouping
- •Group Shapes: Select multiple shapes and press G
- •Ungroup: Select a group and press ⌘G
- •Nested Groups: Create complex hierarchies
Editing
- •Copy: Press ⌘C to duplicate selected elements
- •Delete: Press Delete or Backspace to remove
- •Transform: Use Inspector panel to adjust position, scale, and rotation
7SVG Import & Export
📥 Import SVG
Import existing SVG files to use as puzzle boundaries or design elements.
Shortcut: ⌘I
- Paths, rectangles, circles
- Groups and transforms
- ViewBox and coordinates
📤 Export SVG
Export your designs and generated puzzles as standard SVG files.
Shortcut: ⌘E
- Standard SVG 1.1 format
- Preserves all transforms
- Maintains group hierarchies
Premium Feature
Premium subscription required for exporting generated jigsaw puzzles. Free users can design and generate, but export is limited.
8Keyboard Shortcuts
File Operations
Edit Operations
Selection
Troubleshooting
Shapes aren't appearing
Check that you're in the correct drawing mode. Verify canvas size has space for your shape. Check shape fill/stroke colors aren't transparent.
Can't select a shape
Switch to Select Tool (cursor icon). Ensure the shape isn't hidden behind others. Try using Ctrl+Click to drill into groups.
Jigsaw generation fails
Ensure your boundary shape is a closed path. Reduce piece count for complex shapes. Check that slot templates are valid.
Export is disabled
Premium subscription required for exporting generated puzzles. Free tier allows design but limits export functionality.
Why JigsawDesigner for Cutline Generation?
✓Laser Cutting SVG
Generate clean, precise SVG paths optimized for laser cutting machines like Glowforge, Cricut, and CO2 lasers.
✓Custom Puzzle Dielines
Create unique die-lines with Voronoi patterns that ensure every single puzzle piece is unique and impossible to mix up.
✓Manufacturing Ready
Export designs in professional vector formats (SVG, PDF) ready for mass production or artisan hand-cutting.
Need More Help?
Visit our support page or contact us directly for personalized assistance